The PHP team is pleased to announce the second testing release of PHP 8.2.0, Alpha 2. This continues the PHP 8.2 release cycle, the rough outline of which is specified in the PHP Wiki.For source downloads of PHP 8.2.0 Alpha 2 please visit the download page.Please carefully test this version and report any issues found in the bug reporting system.Please DO NOT use this version in production, it is an early test version.For more information on the new features and other changes, you can read the NEWS file, or the UPGRADING file for a complete list of upgrading notes. These files can also be found in the release archive.The next release will be PHP 8.2.0 Alpha 3, planned for 7 Jul 2022.The signatures for the release can be found in the manifest or on the QA site.Thank you for helping us make PHP better.
Benchmarking Serialization – Larry Garfield
Benchmarking Serialization
I was discussing recently with a TYPO3 colleague about performance, specifically caching. Both he and I are working on systems that may involve hundreds or thousands of objects that need to be cached for later use. The objects themselves are fairly small, but there’s a large number of them. The data format is only internal, so we don’t need anything standardized or parsable by outside systems.
PHP actually has two options for this use case: serialize()/unserialize() and var_export()/require(). But which is better?
Quick, to the benchmark mobile! The results I found were not at all what I expected.
Continue reading this post on PeakD.
Larry
21 June 2022 – 2:42pm
A new OAuth2 client for Javascript – Evert Pot
Frustrated with the lack of well maintained, minimal OAuth2 libraries, I wrote
my own. This new OAuth2 library is only 3KB gzipped, mainly because it
has 0 dependencies and relies on modern APIs like fetch() and
Web Crypto which are built in Node 18 (but it works with Polyfills on
Node 14 and 16).
It has support for key features such as:
authorization_codewith PKCE support.passwordandclient_credentialsgrants.- a
fetch()wrapper that automatically adds Bearer tokens and refreshes them. - OAuth2 endpoint discovery via the Server metadata document (RFC8414).
- OAuth2 Token Introspection (RFC7662).
If your server does support the meta-data document, here’s how simple the
process can be:
client_credentials example
import { OAuth2Client } from '@badgateway/oauth2-client'; const client = new Client({ clientId: '..', clientSecret: '..', server: 'https://my-auth-server.example'
}); const tokens = await client.clientCredentials();
Without the meta-data document, you will need to specify settings such as the
tokenEndpoint and possibly the authorizationEndpoint depending on which
flow you are using.
authorization_code example
The authorization_code flow is a multi-step process, so a bit more involved.
The library gives you direct access to the primitives, allowing you to
integrate in your own frameworks and applications.
import { OAuth2Client, generateCodeVerifier } from '@badgateway/oauth2-client'; const client = new OAuth2Client({ server: 'https://authserver.example/', clientId: '...',
}); // Part of PCKE
const codeVerifier = await generateCodeVerifier(); // In a browser this might work as follows:
document.
Truncated by Planet PHP, read more at the original (another 2436 bytes)
A primer on GCP Compute Instance VMs for dockerized Apps [Tutorial Part 8] – Pascal Landau
In the eighth part of this tutorial series on developing PHP on Docker we will take a look on
the Google Cloud Platform (GCP) and create a Compute Instance VM to run dockerized
applications. This includes:
- creating VMs
- using a container registry
- using a secret manager
All code samples are publicly available in my
Docker PHP Tutorial repository on Github.
You find the branch with the final result of this tutorial at
part-8-gcp-compute-instance-vm-docker.
All published parts of the Docker PHP Tutorial are collected under a dedicated page at
Docker PHP Tutorial. The previous part was
Create a CI pipeline for dockerized PHP Apps.
and the following one is
Deploy dockerized PHP Apps to production on GCP via docker compose (available at 2022-06-27).
If you want to follow along, please subscribe to the RSS feed
or via email to get automatic notifications when the next part comes out 🙂
Table of contents
- Introduction
- Set up a GCP project
- Create a service account
- Set up the
gcloudCLI tool - Set up the Container Registry
- Set up the Secret Manager
- Compute Instances: The GCP VMs
- Provision the VM
Truncated by Planet PHP, read more at the original (another 112016 bytes)
PHP Latest Version: Why You Need to Update
Still using an old version of PHP? In this blog, we’ll break down the four main reasons to upgrade your PHP stack on IBM i.
PHP 8.2.0 Alpha 1 available for testing – PHP: Hypertext Preprocessor
The PHP team is pleased to announce the first testing release of PHP 8.2.0, Alpha 1. This starts the PHP 8.2 release cycle, the rough outline of which is specified in the PHP Wiki.For source downloads of PHP 8.2.0 Alpha 1 please visit the download page.Please carefully test this version and report any issues found in the bug reporting system.Please DO NOT use this version in production, it is an early test version.For more information on the new features and other changes, you can read the NEWS file, or the UPGRADING file for a complete list of upgrading notes. These files can also be found in the release archive.The next release will be PHP 8.2.0 Alpha 2, planned for 23 Jun 2022.The signatures for the release can be found in the manifest or on the QA site.Thank you for helping us make PHP better.
Xdebug Update: May 2022 – Derick Rethans
Xdebug Update: May 2022
London, UK
Tuesday, June 7th 2022, 09:13 BST
In this monthly update I explain what happened with Xdebug development in this past month. These are normally published on the first Tuesday on or after the 5th of each month.
Patreon and GitHub supporters will get it earlier, around the first of each month.
You can become a patron or support me through GitHub Sponsors. I am currently 46% towards my $2,500 per month goal. If you are leading a team or company, then it is also possible to support Xdebug through a subscription.
In May, I spend 25 hours on Xdebug, with 27 hours funded.
Development
I continued my exploration of different set-ups that developers use, and have now merged the branch that adds support for the “pseudo-hosts” xdebug://gateway and xdebug://nameserver, which can be used with the xdebug.client_host setting instead of, and in addition to the Docker specific host.docker.internal. This pseudo-host automatically evaluates to the network gateway address, or name server as defined in /etc/resolv.conf, in the container, which will then allow Xdebug to connect to an IDE on the host machine.
I have not figured out how to do it will all different set-ups, so if you have extra information, or if I am still missing set-ups, feel free to comment on the Google Doc.
In the more complicated set-ups, it would likely be easier to use Xdebug Cloud as it has none of these networking complications.
The other big feature that I have worked on is the introduction of the capture of return values while debugging. This feature allows you to step into the “return value from function” phase, where PHP returns a value to the caller function. In this step, there will only be one variable available, which is the return value of that function.
Right now IDEs will have to opt into this new feature, with PhpStorm and the VS Code Plug-in teams confirming that they will make changes for this.
In this GIF you can see how this is useful with fluent interfaces:

Course
I have now recorded the first lesson of the course, and I am editing it with the plan to release this in the next few weeks. It will take a little time, as I need to get into the flow of editing and producing them; and of course, a new web site needs to be constructed as well. Stay tuned!
For further lessons I have started to draft outlines, and they are in different states of completion.
If you want to make sure that the course covers specific tasks that you find hard to do, or what you would like explained, please drop me an email, or leave a comment.
Xdebug Cloud
Xdebug Cloud is the Proxy As A Service platform to allow for debugging in more scenarios, where it is hard, or impossible, to have Xdebug make a connection to the IDE. It is continuing to operate as Beta release. Packages start at £49/month.
If you want to be kept up to date with Xdebug Cloud, please sign up to the mailinglist, which I will use to send out an update not more than once a month.
Xdebug Videos
I have published one new video this month:
You can find all previous videos on my YouTube channel.
Truncated by Planet PHP, read more at the original (another 657 bytes)
PHP Internals News: Episode 102: Add True Type – Derick Rethans
PHP Internals News: Episode 102: Add True Type
London, UK
Thursday, June 2nd 2022, 09:06 BST
In this episode of “PHP Internals News” I talk with George Peter Banyard (Website, Twitter, GitHub, GitLab) about the “Add True Type” RFC that he has proposed.
The RSS feed for this podcast is https://derickrethans.nl/feed-phpinternalsnews.xml, you can download this episode’s MP3 file, and it’s available on Spotify and iTunes. There is a dedicated website: https://phpinternals.news
Transcript
- Derick Rethans 0:00
-
Hi I’m Derick. Welcome to PHP internals news, the podcast dedicated to explaining the latest developments in the PHP language. This is episode 102. Today I’m talking with George Peter Banyard about the Add True Type RFC that he’s proposing. Hello George Peter, would you please introduce yourself?
- George Peter Banyard 0:33
-
Hello, my name is George Peter Banyard, I work part time for the PHP Foundation. And I work on the documentation.
- Derick Rethans 0:40
-
Very well. We’re co workers really aren’t we?
- George Peter Banyard 0:43
-
Yes, indeed, we all co workers.
- Derick Rethans 0:45
-
Excellent. We spoke in the past about related RFCs. I remember, which one was that again?
- George Peter Banyard 0:51
-
Making null and false stand alone types
- Derick Rethans 0:53
-
That’s the one I was thinking of him. But what is this RFC about?
- George Peter Banyard 0:56
-
So this RFC is about adding true as a single type. So we have false, which is one part of the Boolean type, but we don’t have true. Now the reasons for that are a bit like historical in some sense, although it’s only from PHP 8.0. So talking about something historical. When it’s only a year ago, it’s a bit weird. The main reason was that like PHP has many internal functions, which return false on failure. So that was a reason to include it in the Union types RFC, so that we could probably document these types because I know it would be like, string and Boolean when it could only return false and never true. So which is a bit pointless and misleading, so that was the point of adding false. And this statement didn’t apply to true for the most part. With PHP 8, we did a lot of warning to value error promotions, or type error promotions, and a lot of cases where a lot of functions which used to return false, stopped returning false, and they would throw an exception instead. These functions now always return true, but we can’t type them as true because we don’t have it, and have so they are typed as bool, which is kind of also misleading in the same sense, with the union type is like, well, it only returns false. So no point using the boolean, but these functions always return true. But if you look at the type signature, you can see like, well, I need to cater to the case where the returns true and when returns false.
- Derick Rethans 2:19
-
Do they return true or throw an exception?
- George Peter Banyard 2:22
-
Yeah, so they either return true, or they either throw an exception. If you would design these functions from scratch, you would make them void, but legacy… and we did, I know it was like PHP 8.0, we did change a couple of functions from true to void. But then you get into these weird shenanigans where like, if you use the return value of the function in a in an if statement, null gets because in PHP, any function does return a value, even a void function, which returns null. Null gets coerced to false. So you now get like, basically a BC break, whi
Truncated by Planet PHP, read more at the original (another 18110 bytes)
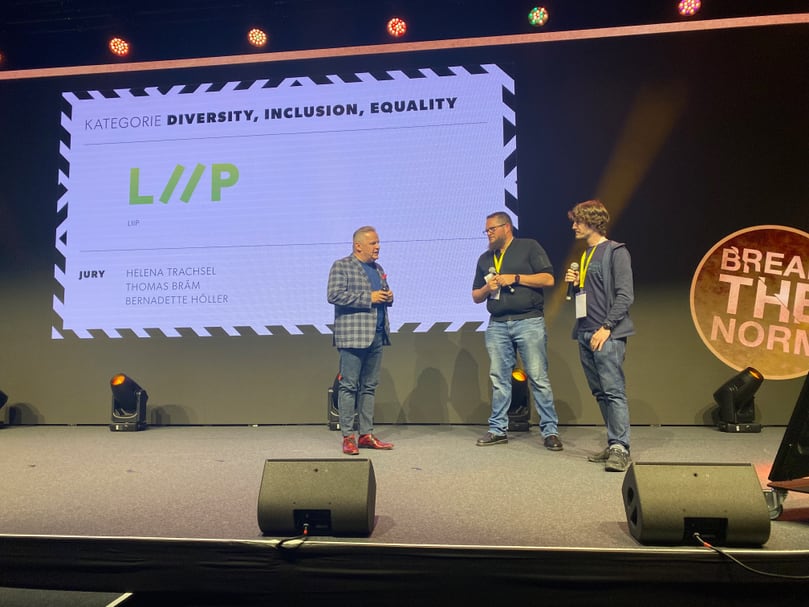
Liip revolutioniert das Lohnsystem – Liip
Das neue Lohnsystem der selbstorganisierten Digitalagentur Liip gewinnt den Swiss HR Award in der Kategorie “Diversity, Inclusion, Equality”. Der Liip Deal stellt Mitarbeitende ins Zentrum. Ganz nach dem Motto digital, human progress wird die agile Weiterentwicklung zugänglich gemacht, denn viele fortschrittliche Organisationen stehen vor dem Schritt, neue Lohnsysteme einzuführen.
Der Swiss HR Award
Der Swiss HR Award zeichnet jährlich innovative Projekte in der “People-Welt” aus. Die Inhalte der Arbeiten müssen kreativ neue Wege beschreiten, mutig Neues ausprobieren und Wirkung zeigen – mit effektiven Resultaten. Der Swiss HR Award setzt damit Qualitätsstandards für Arbeitsmodelle und zukunftsweisende Ideen im HR Bereich. Die Fachjury beurteilt Projekte in sieben Kategorien. Mit dem neuen Lohnsystem wandelt Liip die Kultur und setzt sich aktiv für ein System ein, welches Diversität, Inklusion und Gleichstellung fördert.

Von link nach rechts: Zahida Huber, Sergio Mendolia, Nadja Perroulaz und Pascal Helfenstein
“Selbstbestimmung, Gleichstellung und Klarheit in der Entschädigung war unser Ziel. Das war nicht immer einfach zu balancieren. Aber wir haben es geschafft, ein System zu kreieren, dass zur Selbstorganisation passt und die Mitarbeitenden ins Zentrum stellt”. So Sergio Mendolia, Fullstack Developer and Salary Process Developer bei Liip.
Das neue Lohnsystem – der Liip Deal
Ein gleichberechtigtes Lohnsystem, das keine Unterschiede zwischen Berufsbildern und möglichst kleine Lohnunterschiede macht, das lebt Liip schon seit der Gründung. Um am Ball zu bleiben, entwickelt das Digitalunternehmen sein Entlöhnungssystem kontinuierlich weiter. Das Lohnsystem wurde 2016 entwickelt und basiert auf dem Konzept der Peer-Evaluation. Seit 2018 sind das System sowie die daraus resultierenden Löhne vollständig transparent: Alle Mitarbeitende wissen, wer was verdient und wie der Lohn berechnet wird; das bleibt auch so. Das neue System basiert auf 2 Kriterien mit jeweils 6 Stufen, Ein Basissalär basierend auf den Lohnrechner bildet die Grundlage. Mitarbeitende schätzen darin selbst ihre Expertise und den erzielten Impact ein, welcher dann von mindestens 2 Kolleg*innen überprüft und kommentiert wird. Das Alter und die Loyalität dazugerechnet, entsteht der individuelle Lohn.
Jurypräsident Jörg Buckmann übergibt den Swiss HR Award an Sergio Mendolia und Pascal Helfenstein
“Agiles Arbeiten gehört auch bei internen Veränderungen zum Standard. Wir teilen unsere Erfahrungen bewusst mit agilen Organisationen und anderen interessierten Unternehmen, denn Open Source ist in unserer DNA. Es macht Spass, mit solchen Projekten aktiv etwas zu bewegen.” sagt Pascal Helfenstein, Software Engineer und Salary Process Developer bei Liip.
Mitarbeitende im Zentrum des neuen Lohnsystems
Was ist revolutionär am neuen Lohnsystem von Liip? Es ist auf agile Organisationen zugeschnitten, impliziert eine hohe Eigenverantwortung und ist Zweck- und Wirkungsorientiert. Ein Lohnsystem also, das nicht verhandelbar ist, auf Selbst- und Peer-Evaluationen basiert und transparent ist. Alle Mitarbeitenden – auch die ehemalige Geschäftsleitung – werden in das System eingebunden. Es gilt die gleiche Bezahlung in allen Funktionen durch das Basissalär. Zusätzlich dazu werden höhere Gehaltsstufen mit der Expertise und Wirkung erreicht. Zudem macht Liip als Arbeitgeberin explizit, dass Mitarbeitende nicht nur mit ihrem monatlichen Gehalt entlöhnt werden, sondern mit einem ganzen Paket, dem “Liip Deal”.
“Mit unserem “Liip Deal” haben wir ein in der Schweiz neues und einzigartiges System entwickelt. Alle Prozesse und Systeme wurden von Grund auf neu definiert und entwickelt. Mit dem Lohnrechner als Basis bleiben die Löhne marktgerecht. Und wir nehmen die Mitarbeitenden in die Verantwortung, denn sie starten eine Lohnveränderung mit der Selbstevaluation”, sagt Nadja Perroulaz, Mitgründerin von Liip.
Die Digitalagentur freut sich sehr über die Auszeichnung am diesjährigen Swiss HR Award.
Mehr zum Thema: liip.ch/de/blog/salary-system-liip
Der Podcast des Agile Breakfast: swissict.ch/agile-breakfast-kompakt-002-mit-nadja-perroulaz
3 steps to make your devs love you by preparing custom icons the right way – Liip
For a recent project, we felt it was necessary to ship a few of our own custom icons. Before bringing them over to code, I tidied up the design files. It quickly dawned on me that you should follow a clear protocol to help the development be as efficient as possible. To make your and the life of your developers easier, I want to share the following 3 steps with you. Everybody loves doing less busy work! This write-up focuses on Figma because that’s what we use, but most of the steps should be similar for other design software.
Step 1: Use a single icon component
Self-care is important, so this first one is for my designer buddies: Do yourself a favour and use Figma components. More specifically, use just one component for all icons and then add a variant for each specific icon.
Unfortunately, selecting the icon variant from the variant dropdown in Figma is a bit clunky. You might be tempted to make a component for each individual icon. That’s good; at least you’re using components. There is, however, a tremendous disadvantage to this.
Most likely, the icon component will at some point be consumed by other components. A button component is a natural example of this. If you want a little icon next to the button label, use a single component and you can just drop in the icon component. Boom! You’re done. What about adding a new icon? Add a variant, update, and it’s available in the button. If you use individual components, you have to add each new one to the button, creating a considerable amount of pointless work.
By the way, this is not exclusive to custom icons. It also helps to do this when dealing with library icons from Figma plugins (which, really, should give you a component to work with, but most of them won’t).
Step 2: Size icons so they have the same aspect ratio
Now that we have the Figma in order for ourselves, we move on to help our devs. To get our custom icons from Figma to code, it is very important that they all can be exported with the same aspect ratio. You don’t feel the pain of this in a design tool, but icons must be treated completely interchangeable in UI code. If different icons have different aspect ratios, that means we potentially have to adapt the whitespace of the button, table, or alert in which we use the icon to keep padding consistent. That means we must review every individual usage. Different sizes generate a lot of individual exceptions in UI code, creating undue extra work for developers. That’s why we say that this is bad architecture: Icons should not influence their parent components, they should be generic. This should be fixed at the source, so it’s on us designers. To prevent fiddling with Figma’s resizing options, create an explicitly sized frame in Figma and drag your icon into it.

We usually don’t encounter this problem because most libraries just export icons as squares. This is certainly the most one-size-fits-all approach, but if all your brand’s icons work better in a 4:3 aspect ratio, then go for it. The important thing is that every icon has the same format.
Step 3: Make sure your icons have similar visual weight
While sizing icons for export, there’s a good chance you will run into an issue where multiple icons in a button bar or a longer form are not balanced right. You correctly put all icons in same-size, same-aspect-ratio containers, but something looks off. Some icons draw the eye more. This is another thing we have to fix that libraries usually provide for us out of the box. Icons that have heavier lines, more filled out areas, or a better fitting shape for our chosen aspect ratio look bigger than others. You can make them smaller or larger within their frame to visually balance them with the other icons in your set.
It’s possible you don’t realise this was an issue because you can just resize icons in Figma to deal with it. But that doesn’t work in code, where the size of parent components might be affected. Again, you must fix the root of the problem by not generating exceptions in the first place. Remember, developers could be dealing with hundreds of permutations here, especially if icons can be set in your site’s CMS.
There you go! With the help of Figma’s excellent SVG exporting capabilities, developers should be able to take it from here. These are the steps I would recommend taking with custom icons to make your own and other people’s lives easier. Please try them, I’d love to know how they work for you!
Featured Image by Balázs Kétyi on Unsplash